The Planar Head, Explained: How Planes Predict Light
A beginner's guide to the Asaro planar head: the main plane groups, how they predict where light and shadow fall, and how to find them on a real face.
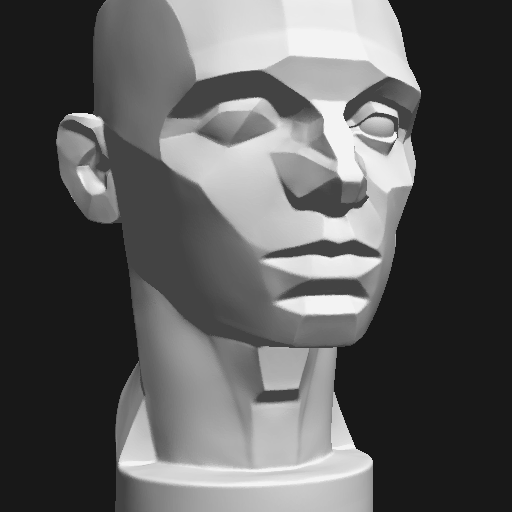
The human face is covered in soft, rounded forms, and that is exactly what makes it hard to draw. There are no clear edges to tell you where the light ends and the shadow begins. The planar head fixes this. It rebuilds the face out of flat planes, like a diamond that has been cut, so every surface has one clear direction. Once a surface faces one direction, you can tell at a glance whether it points toward the light or away from it.
If you are just starting out, this is the single most useful model you can learn. It teaches you to see light and shadow as shapes instead of guessing.
Where the Asaro head came from
The most common planar head is called the Asaro head, after the sculptor John Asaro, who first made it in the 1970s. Other artists had drawn simplified heads before, but Asaro’s version caught on for one reason: it was designed to show where shadows fall.
Older shortcuts, like drawing the head as a ball with a few lines (the Loomis method), are great for getting the shape and angle of the head right. But a smooth ball hides the planes, so it cannot tell you much about light. Asaro did the opposite. He cut the head into clear flat surfaces so that each one obviously points somewhere. That makes the light easy to reason about.
Today the Asaro head is a standard studio tool. Ateliers keep a cast of it on the shelf next to the plaster casts, and most digital art tools include a version of it.
The main plane groups
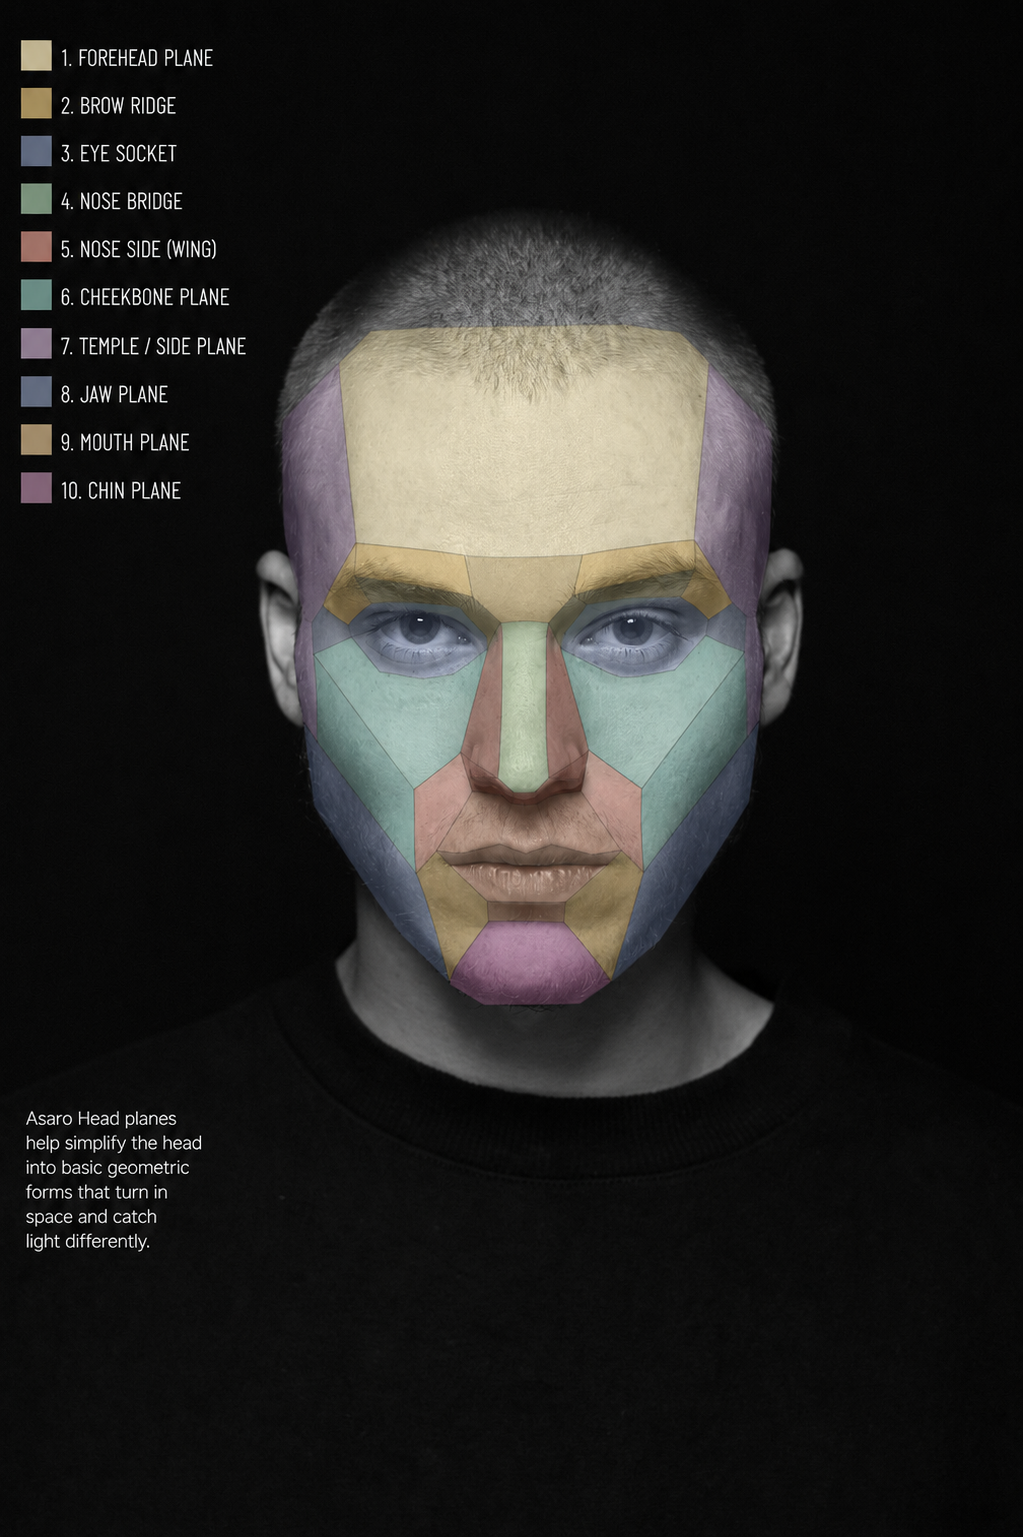
You do not need to memorise every little facet. Beginners should learn the big groups first, because these are the ones that control most of the light and shadow.
- The top of the head (the cranium). The large dome of the skull. It usually catches light from above.
- The front of the face. The forehead, the flat front of the cheeks, and the front of the mouth area. These face forward, so a light in front of the model hits them first.
- The sides of the face. The side of the skull, the side planes of the nose, and the side of the jaw. These face left and right, so they go dark when the light comes from the front.
- The underplanes. The surfaces that face downward, like the underside of the nose, the brow, the top lip, and the base of the chin. These almost always sit in shadow, because most light comes from above.
If you can find those four groups, you already understand most of what is happening on a lit face. As you get comfortable, you can split them further into the named planes below.
How planes tell you where light breaks
This is the part that makes the whole model worth learning. Pick one light source, then sort every plane into one of three buckets based on which way it faces:
- Light. Planes that face toward the light. These are your lightest values.
- Halftone. Planes that face across the light, at a slant. These are the mid greys, the transition between light and shadow.
- Shadow. Planes that face away from the light. These are your darks.
The important idea for beginners: the line where light turns into shadow is not random. It falls exactly on the plane break where a surface stops facing the light and starts facing away. Artists call this line the terminator. On a smooth face it is fuzzy and hard to find. On the planar head it sits right on an edge, so you can point to it.
And because the planes never move, you only have to learn them once. Move the light and the same planes simply switch buckets.
How to break a real face into planes
Here is a simple routine you can use on any photo or model. Work from big to small.
- Find the light direction. Look for the brightest spot on the face, then follow the shadows to work out where the light is coming from. Everything else depends on this.
- Draw the light and shadow as two shapes. Squint hard until the face turns into a simple pattern of light and dark. Ignore all detail. Draw the shadow as one flat shape.
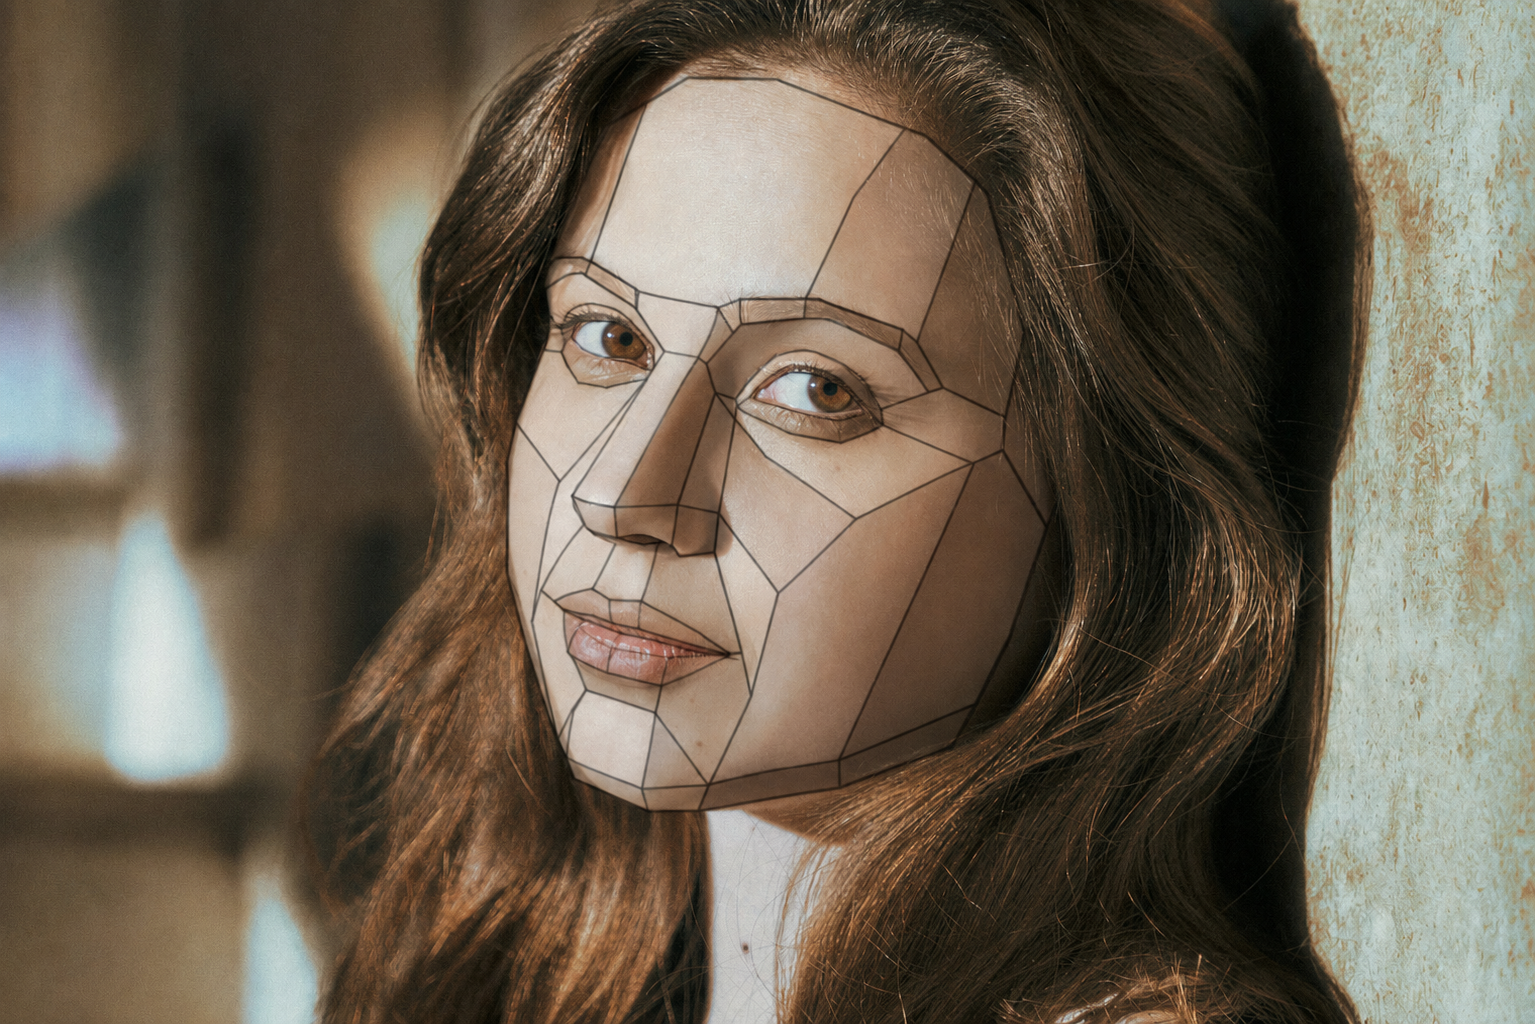
- Block in the big planes. Mark the front of the face, the sides, the top, and the underplanes. Ask of each one: does this face the light or turn away? That answer decides whether it is light or shadow.
- Break the features into small planes. Treat the nose as a simple box with a top, two sides, and a bottom. Do the same for the brow, the lips, and the ball of the chin. Give each little plane its correct light or shadow.
- Soften last. Once the plane pattern is right, you can round the hard edges back off and let the face look smooth again. Keep the light and shadow shapes you found.
The order matters. Beginners almost always jump to smooth shading too early, before the big shapes are correct, and then no amount of blending saves the drawing.
Common beginner mistakes
- Adding too many planes. More facets do not make it more accurate. They just bring back the confusing smooth surface you were trying to simplify. Stick to the big groups.
- Shading before the shapes are right. Get the light and shadow shapes correct first. Detail comes last.
- Studying only one light. If you always draw the head under the same light, you have memorised one picture, not the model. Move the light around and watch what changes.
- Treating the plane drawing as the finished art. The planar head is practice, not a style. The goal is to train your eye so you can see these planes hiding under real skin.
Practise it in Art Atelier
The planes really click when you can move the light yourself and watch the shadows shift. That is what Art Atelier is for. You turn a 3D Asaro planar head to any angle, orbit a studio light around it, snap to classic setups like Rembrandt and split lighting, then switch on value steps to flatten the shading into a few clear tones. The planar head is free in the app on iOS and Android.
Next: How to see values like an atelier student, covering squinting, the value scale, and simple notan studies.
Practise this in Art Atelier
Orbit a studio light around a 3D planar head, snap to classic presets, and posterize the values into a notan. Free on iOS & Android.
Download the app